In this tutorial, we will focus on Automation Testing.
This what I will present in this post will be testing in Selenium.
What is Selenium?
Selenium is a portable framework that we can use for test web applications. When we will visit the official Selenium website, we can see that we have 3 types of Selenium: Selenium Webdriver to code browser-based tests across many environments, which is a collection of language-specific bindings to drive a browser. Moreover, we have Selenium IDE, a Chrome and Firefox add-on that will do simple record-and-playback interactions with the browser to create quick bug reproduction scripts and create scripts to aid in automation-aided exploratory testing. Lastly, we have Selenium Grid, which we can use to scale by distributing and running tests on several machines. What more, we can also manage multiple environments from a central point. We will focus on Selenium WebDriver in this tutorial.
How Selenium WebDriver works?
Selenium WebDriver is a browser automation framework that accepts commands and sends them to a browser. Furthermore, it is implemented through a browser-specific driver. It controls the browser by directly communicating with it.
What do we need to know before using Selenium WebDriver?
Selenium WebDriver supports the programming languages such as Java, Python, C#, PHP, Perl, and Ruby. It supports the Operation Systems: Windows, macOS, Linux, Solaris. Selenium supports a wide range of web browsers such as Mozilla Firefox, Internet Explorer, Google Chrome 12.0.712.0 and above, Safari, Opera 11.5 and above, Android, iOS, and HtmlUnit 2.9 and above.
We will use Selenium WebDriver in Java programming language so you will need to know at least the basics of Java.
How to install Selenium?
My environment is:
System: macOS
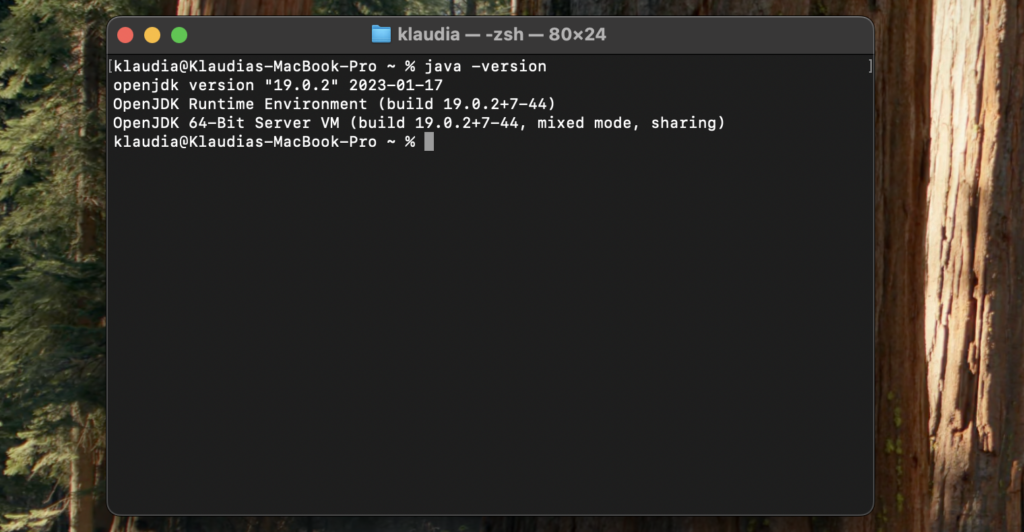
Java version: java version “15.0.1” 2020-10-20
Java(TM) SE Runtime Environment (build 15.0.1+9-18)
Java HotSpot(TM) 64-Bit Server VM (build 15.0.1+9-18, mixed mode, sharing)
Installing Java
Firstly, we need to check the java version on our machine. We can do this by opening the terminal and type the command: java -version.
The version of installed Java should appear.
If you don’t have Java installed yet, don’t worry, you can download it and install it here.
Installing Eclipse
Once we have installed Java, we need to install Eclipse from the official website.

When we will open the website, we will see Get Eclipse IDE 2021-03 Download x86_64. Don’t worry, if you’re using macOS or Linux, it will work, just click and download.
Once downloaded, open the file and you will see the following options:
Eclipse installer photo
We are choosing the Eclipse IDE for Java Developers. Once we have done that we have to choose the Java 11+ VM (once you have installed Java, it will be chosen automatically) and installation folder, then click Install.
After the installation, we can install the selenium. To install the selenium library we go again to its official website and under the Selenium WebDriver, we are clicking the Download button. There will open a new page.
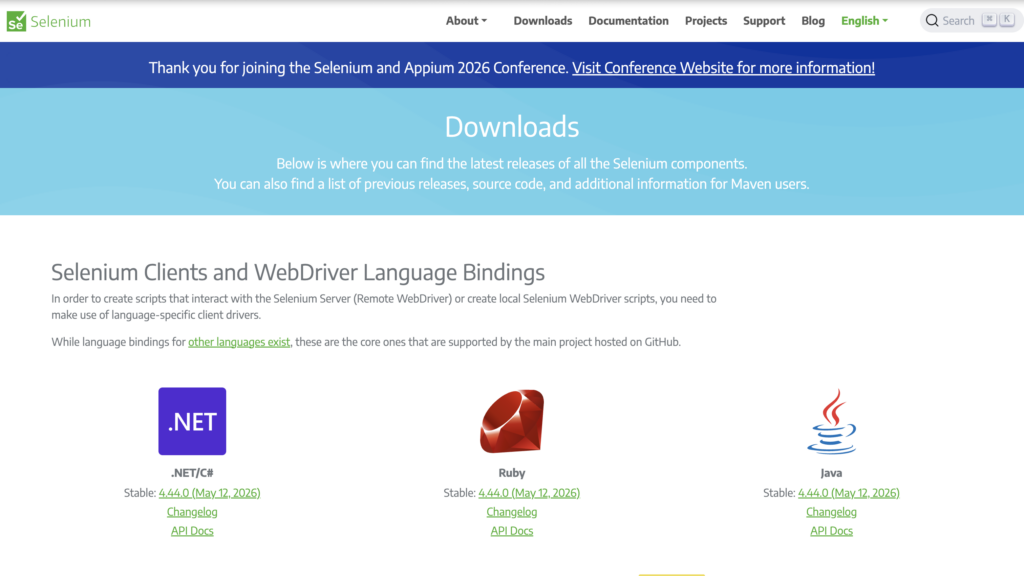
We are looking for a Java version and clicking Download and also look for Browsers.
To finish this post!