In this tutorial, we will get some information about End-to-end testing, the Cypress Test Automation Framework, and we will even use it in the example.
E2E Testing
What is E2E Testing? End-to-end testing is a type of testing in which we test business processes (user journey) from start to finish under production-like circumstances.
The main advantage of E2E testing is for instance that ensures Complete Correctness & Health of the Application. Moreover, it can also increase Confidence in the Application or even reduce Future Risks. In addition, it also reduces the risk of repetitive efforts.
Besides advantages, E2E testing also has disadvantages. One of the main disadvantages is that E2E tests take longer to run, depending on how we have written the test. Tests also require regular maintenance.
We can execute End-to-end testing manually; however, we can also run automated test scripts. In this tutorial, we will execute an automated E2E test script.
E2E Automation Testing frameworks
As you decided to start scripting End-to-end test scripts, you need to consider that in which E2E automation testing framework to use to execute them. Let’s take a look at the 3 most popular E2E automation testing frameworks.
Selenium
Selenium is the one of oldest test automation frameworks. It provides packages for various programming languages such as Java, Python, C#, Ruby, Javascript, etc. Selenium has a wide range of functions that help you simulate almost every action that a user would perform. If you want to learn more about Selenium, you can take a look at this tutorial.
Cucumber
Cucumber focuses on behavior-driven development (BDD). We can build a product by considering the perspective of different stakeholders, for instance, developers, QAs, customers, etc. The main reason for Cucumber’s popularity is its simplicity.

Cypress
Cypress is another framework that has made the life of testers much easier. It reduces the problems faced while using Selenium by using a different architecture from that of Selenium. In this tutorial, we will learn more about Cypress.
What is Cypress?
As we’ve had occasion to say before, Cypress is an end-to-end automation testing framework. To create the tests in Cypress, we’re using Mocha, which is a JavaScript testing framework. Cypress makes asynchronous testing simple and convenient. It also uses a BDD/TDD assertion library and a browser to pair with any JavaScript testing framework.
How does it work?
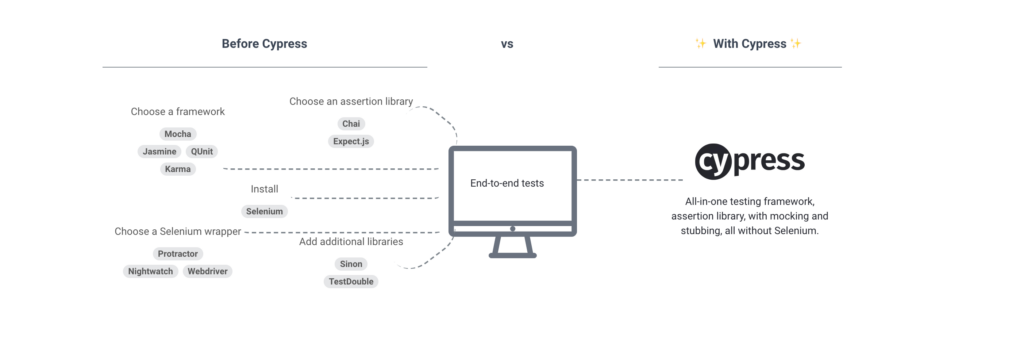
In this section, we will see how Cypress works.
Cypress provides us with a test script runner, which is presented as a visual interface. It indicates all tests and which commands are run, passed, or failed. We can test highly interactive applications and perform different tests, such as manipulating the DOM, asserting that if some element is available, present, or not on the screen. We may also test reading or writing data into or from fields, submitting forms, and even redirecting to a different page without actually making direct modifications to your code.
Advantages and disadvantages
As we know how Cypress works, it’s a good time to see the advantages and disadvantages. It will help us to make a decision if we want to use Cypress in our End-to-end testing process, or maybe we want to choose another E2E framework.
Advantages of Cypress:
- Cypress is JavaScript-based, which means we can test anything that runs in a browser
- We can use Cypress for cross-browser testing; it’s supported by the most popular web browsers such as Chrome, Firefox or Edge. We can see a full list of supported web browsers here
- Cypress is stable, which means that features like sleep or wait are not necessary because it has a built-in mechanism that handles waiting for DOM elements
- Cypress supports interacting with an API for end-to-end testing
- It gives you the ability to travel back in time to each command’s snapshot, like “cy.contains” which allows us to view what happens before or after some action in a specific command
Disadvantages of Cypress:
- Cypress doesn’t support mobile testing
- Cypress does not handle all native events as it uses synthetic events; file upload, hover, and scroll are not supported yet.
- It doesn’t support any other browsers such as IE, Safari, or Opera
- Cypress doesn’t support any other programming language. If you don’t like JavaScript, then you need to find another E2E testing framework
Convinced? Let’s install Cypress then!
As we’ve decided to use Cypress in our E2E automation testing process, we need to install it on our machines.
I’ll use the macOS operating system in this tutorial, so if you have a Windows operating system, don’t worry. I will show you how to install Cypress. All the rest will be a work in IDE, so it doesn’t matter what kind of OS you are using 🙂
First, we need to open a terminal and enter brew update for macOS.

Once our brew has been updated, we can enter the brew install node in the terminal.

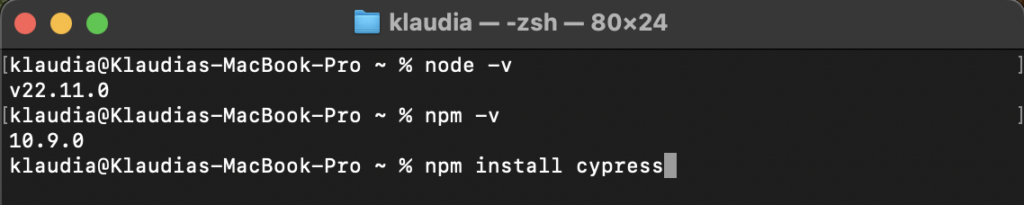
Once our Node.js has been installed, we may check the version of node and npm (installed with node) by using the commands: node -v and npm -v. We should get the following output.

Don’t worry if you’re using Windows OS, you can simply download and install node.js here. To check the version of node and npm on Windows you need to enter the following commands on Command Prompt: node -v and npm -v.
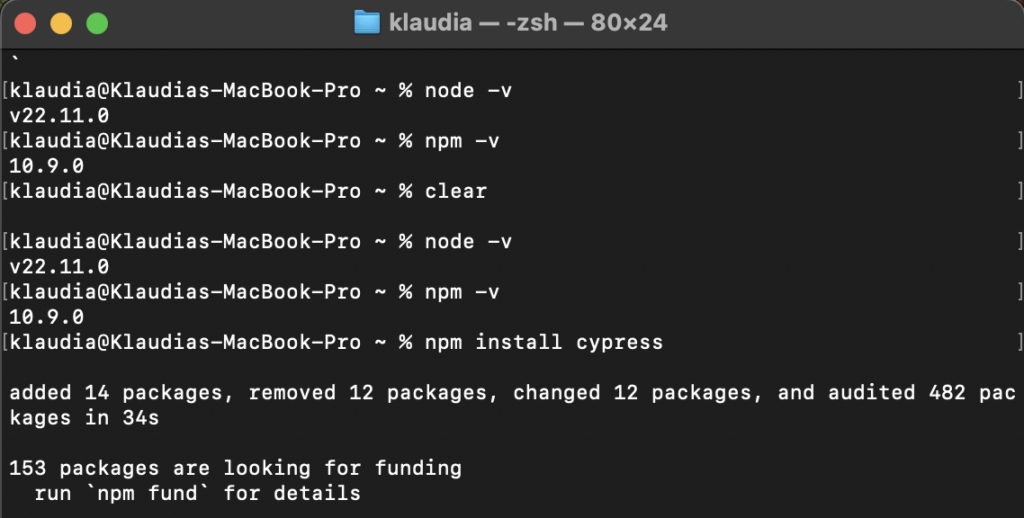
Once we’ve installed npm, we can install Cypress using the command: npm install cypress.
We should get the following output.
If you’re using Windows OS, you can simply download and install Cypress here.
Running interactive Test Runner
As we can see in the last screenshot, there is a command that allows us to open Cypress. Indeed, it is a command that we will use to open Cypress Test Runner. Let’s enter this command in the terminal: node_modules/.bin/cypress open (in Windows OS, it can look a bit different).
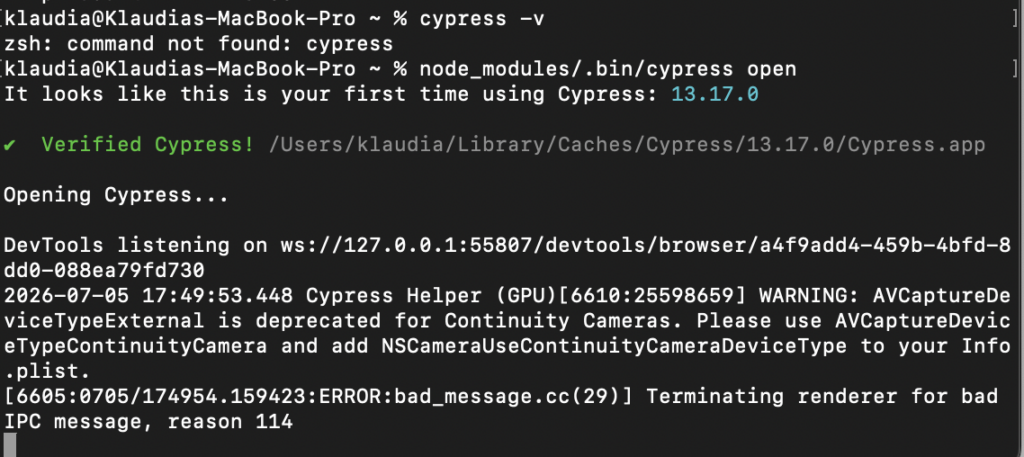
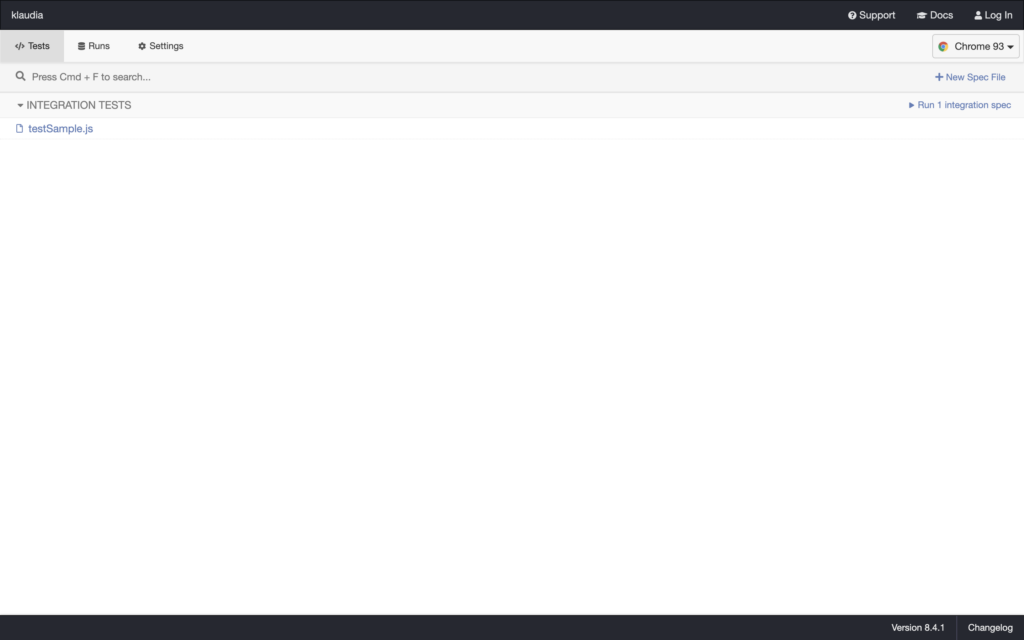
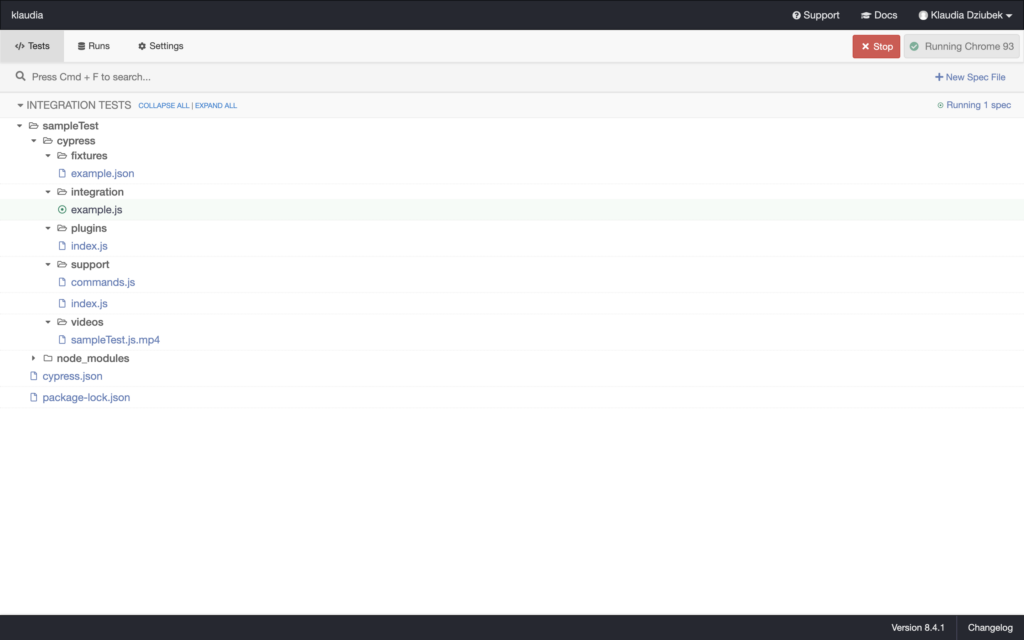
Cypress runs tests in a unique interactive runner that allows you to see commands as they execute while also viewing the application under test. We have here one testSample file to see how the test runner works.
Let’s run the testSample and see what happens upon clicking Run 1 integration spec.
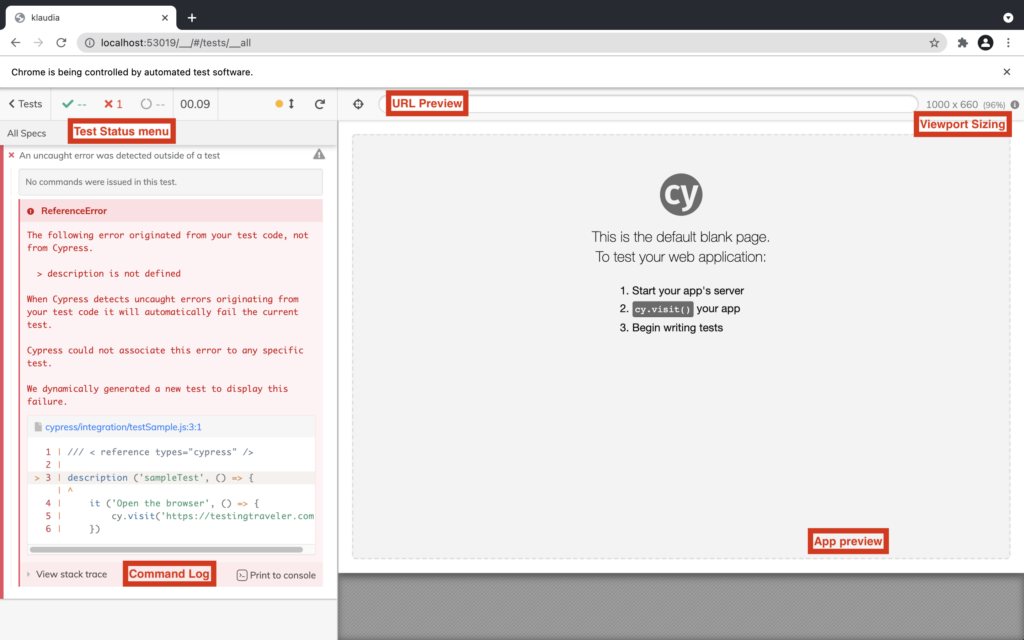
If you are interested in finding more information about Test runner, click here.
First script
Now we can write our first test script, but before we do that, it’s worth explaining the folder structure.
sampleTest is a folder where we keep all the files inside the cypress folder and the node_modules folder. Cypress folder contains the fixtures folder, which includes data to use in the test process. Moreover, the cypress folder contains an integration folder where the files are for test execution. In addition, the cypress folder contains a plugins folder where we can find the opportunity for extended cypress functionality and videos where we can find test evidence recordings. The node_modules folder includes the node files required to run Cypress tests.
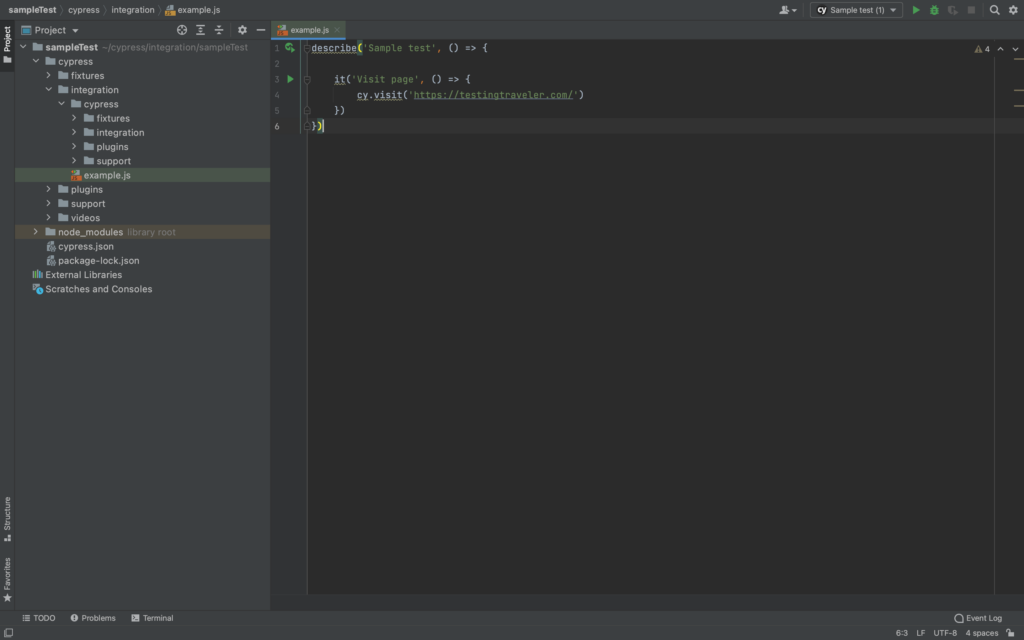
This is what we wrote just now: the simple test script, which allows Cypress to visit the website.
Describe, as the name suggests, the main test (user journey). It describes the test, which is the specific phase of the user journey. cy is the shortcut for cypress, then we put . and the command visit to tell our script that we need to visit the website, in this case, the Testing Traveler website.
We can run our script in the test runner.
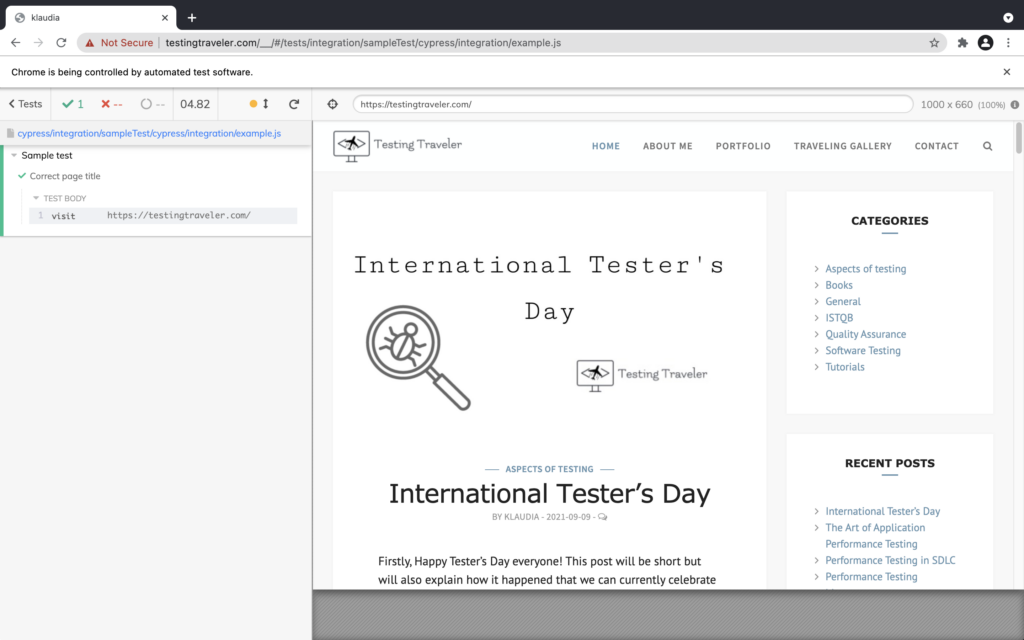
We can also execute the same test in the IDE terminal upon clicking the Run icon.
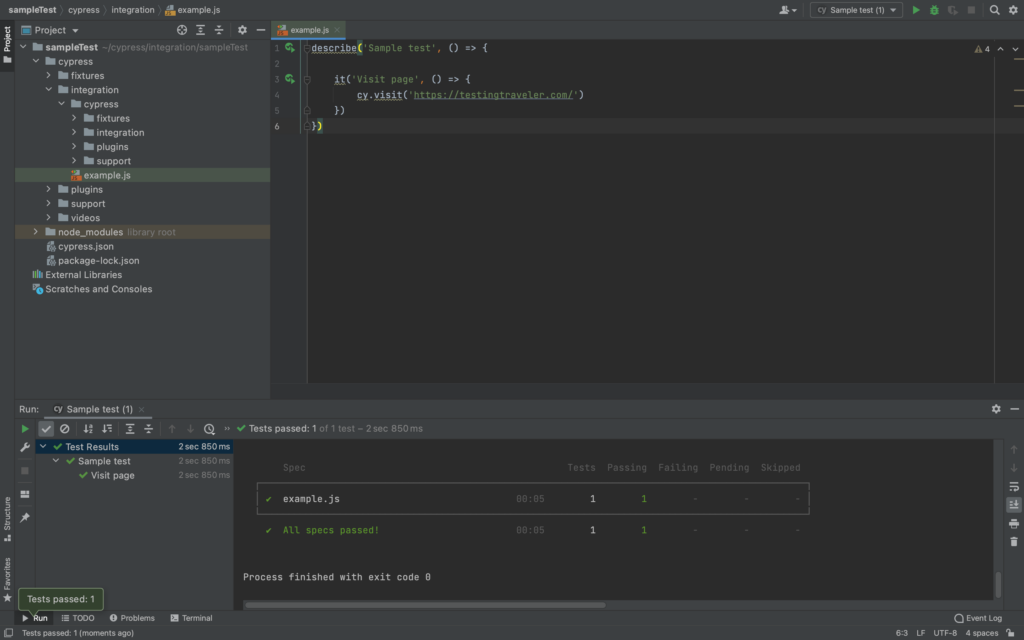
Congratulations! We’ve executed our first test 🙂
List of useful commands
When we create the test scripts, it’s nice to have a list of useful commands.
cy.visit() – Visit a remote URL
.and() – Create an assertion. Assertions are automatically retried until they pass or time out.
cy.viewport() – View the website in a specific screen size
cy.contains() – Get the DOM element containing the text. DOM elements can contain more than the desired text and still match
cy.should() – Create an assertion
cy.get() – Get one or more DOM elements by selector or alias
cy.url() – Get the current URL of the page that is currently active
cy.click() – Click a DOM element
cy.check() – Check checkbox(es) or radio(s)
cy.log() – Print a message to the Cypress Command Log
cy.dbclick() – Double-click a DOM element
cy.clear() – Clear the value of an input or textarea
cy.type() – Type into a DOM element
cy.focus() – Focus on a DOM element
cy.focused() – Get the DOM element that is currently focused
If you’d like to find more interesting commands, you can find them here.
Maybe some examples?
So, we’ve installed Cypress, we wrote and executed a simple script. We will not do more complex user journeys because it would be too much, as it is only a Cypress in a nutshell, a simple tutorial. Let’s take a look at the example of a simple user journey below.
Our user visits the TestingTraveler blog, then opens an article. When a user has read an article and wants to share it. Then the user leaves a reply and closes the website.
When we want to write a script, it’s a good idea to plan it first. So we’re creating simple test steps that are presented below.
- The user visits the website
- Visitor checks the page title
- User opens an article
- Visitor looks for the Principles of Performance Testing
- User wants to share an article
- The user comes back to the article
- Reader leaves a reply
- The user closes the website
As we can see, it’s a simple user journey, and now we will create a simple test script to cover this journey. Then we will run this script to see the results.
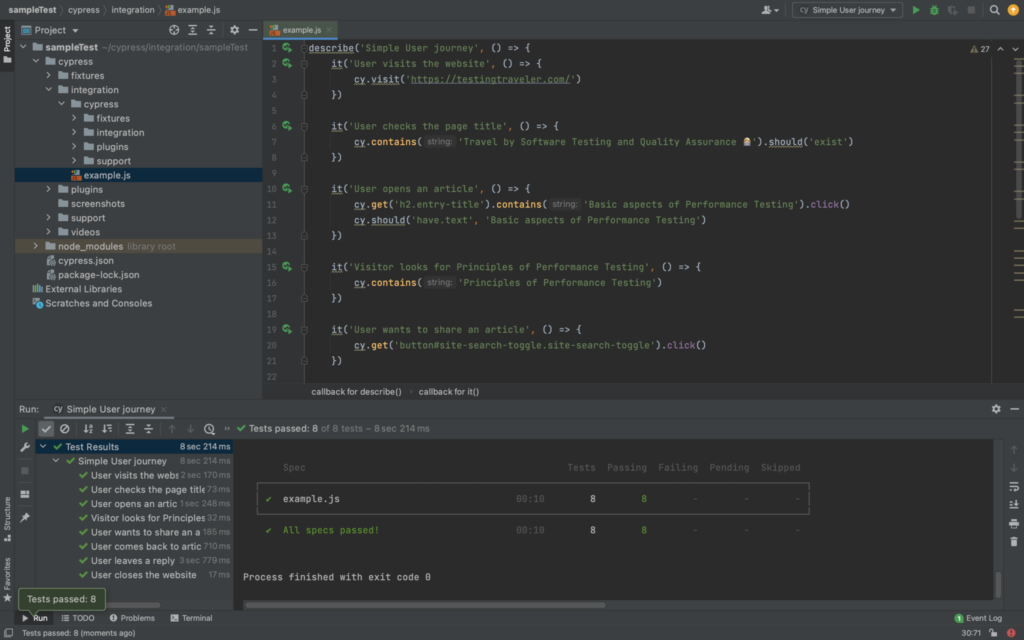
Let’s run the same test in Test Runner.
Congratulations! We’ve done our user journey 🙂
More info to explore
Would you like to find more information about Cypress? Then look at the official Cypress website, where you can find more information about Cypress, official documentation, and much, much more.
Summary
As we can see, Cypress is a really powerful End-to-end automation testing framework. If you know the JavaScript programming language, it’s more than better to use that. In this tutorial, we’ve had an opportunity to get some information about E2E testing and Cypress. We could also install and perform the E2E testing example using Cypress.
I hope you’ve enjoyed the article and found some inspirational information.
The next post will arrive soon 🙂